


Abby's Daisy Daydreams Wall Decal Stickers - Bright Mix
- Description
- Size
- Recommended Surfaces
- Surface Preparation
- Application Tips & Advise
- Removal & Re-use
- How Many Do I Need?
- Warning
Fresh New Daisy Decals!
Daisies are all the rage, popping up in every shape and hue you can imagine!
Looking for a vibrant pop of colour or a more subdued, delicate aesthetic? Our decals have got you covered for an instant room revamp or a full room makeover.
Enter Abby's Daisy Daydreams - a unique daisy shape crafted by the one and only Ariel Lam Art, exclusively for Kasie's Room. We've then mixed and matched an array of colours and sizes to complement a multitude of themes.
Stay tuned because there's even more blooming soon!
Contact us at shop@kasiesroom.com for custom colours.
Kasie's Room's Exclusive New Range of Decals!
Step into the vibrant world of Kasie's Room and discover our Exclusive New Range of Decals! Designed & printed in Queensland, each decal boasts high-quality, 100% removable polyester adhesive fabric. Making them a dream to use.
- Premium quality materials
- Easy application
- PVC Free and non-toxic.
Perfect for renters, our decals provide an easy, no-fuss application and removal process, allowing you to reposition and reuse them multiple times with ease*.
- Rental Friendly Adhesive
- Removable & Re-usable*
- Can be applied over wallpaper
Kasie's Room Exclusive Decals are a wonderful mix of art from gifted local and international talent. All lovingly curated and assembled by our passionate inhouse design team into a range of delightful, vibrant and adorable designs that are the perfect fit for your nursery or little ones room.
- Exclusive Designs
- Locally made
- Supporting Artists
Plus, our blockout material ensures a flawless finish on any wall colour, effectively covering imperfections without letting anything peek through.
- Can be applied over wallpaper
- Does not stick to itself
- Does not easily tear
*The adhesive will not weaken but dust and particles can reduce the adhesion. Please read application instructions to ensure best results.
To ensure you get the best out of your beautiful new decals please take the time to read through the application instructions!
Each pack comes as pictured below with 2 x 300mm x 650mm sheets. Each sheet contains 28 decals for a total of 56 decals per pack.
Daisy sizes are mixed and range from 150mm down to a cute 50mm.

To ensure you get the best out of your beautiful new decals please take the time to read through the application instructions!
Recommended Surfaces
- A smooth, clean, dry painted surface is best.
- Can also be applied to glass, stainless steel, acrylic, polycarbonate and Plexiglas®
- Wash & wear or Teflon infused paints can reduce the adhesion of the product but should still work. Our walls are painted with Dulux Wash & Wear, while the adhesion is not as strong as on other surfaces the decals have still adhered nicely.
- Bare metal (copper, brass, aluminium) can oxidize and melt the adhesive leaving a film in rare cases when removed
- Do not use on varnished wood surfaces
- Always pre-test in an unobtrusive area to ensure the product is right for you.
Freshly Painted Walls:
DO NOT apply to a newly painted wall!
- A freshly painted wall needs time to cure before applying decals.
- Most newly painted walls need 6+ weeks to cure.
- Follow the paint manufacturers recommendation for how long their product takes to cure and remember that the thickness and number of coats of paint, as well as the temperature and humidity levels, will affect this process.
- Decals will not stick to a freshly painted wall and will bubble.
- New builds may take even longer as there is more outgassing.
If you apply your decals to a recently painted wall and they don't adhere or bubbles keep forming carefully remove them and re-attach to their backing paper and wait another 2 weeks before attempting to apply them again.
Please note: While this product is designed to be safely used on many surfaces we do not guarantee that the product will not damage the walls and accept no responsibility if it does.
Warning: Decal stickers are designed for decoration only and are not to be considered as a toy. Please ensure that they are out of reach of children under 3 years of age, especially children in a cot or crib to avoid a possible choking hazard.
This is very important! To ensure you get the best from your new decals please follow the below instructions.
- You must clean the walls with a mild cleaning product to remove dust and oils. Sugar Soap or even dish detergent are options.
- Ensure there is no cleaning residue on the walls by thoroughly wiping them with a clean damp cloth. Rinse cloth frequently in clean water.
- Leave for 1-2 hours to ensure no moisture is left on the wall.
- We recommend flattening the product before sticking it to the wall for ease of application and to create a wrinkle-free finish.
Decal is not designed to be cleaned as this can damage the design. If dusty wipe over with a dry cloth.
It is also recommended that you first test the application and removal in an inconspicuous section of the wall in case the surface is not compatible with being able to adjust them.
We suggest cutting out a piece from the edge that does not include any of the design and using this to test, it is the same material as the design and you don't risk damaging the design.
Application – Small Designs
Simply peal the design off the backing and apply to the prepared wall. Not happy about where it is? Carefully remove and reposition. Being careful when lifting off the wall not to damage the edges.
Application – Large Designs
Start at the top of your design and pull down approximately 10-15cm of the backer and crease the back of the backer. Simply apply the 10-15cm of exposed adhesive area to your chosen location. It can be repositioned many times. Next pull the backer downward in 10-15cm increments, smoothing the decal as you go. Depending on the size, it may be helpful if one person pulls down the backer, while the other smooths the image on the surface.
Bubbles & Wrinkles?
If there are any bubbles or wrinkles, you can lightly press or smooth them out, or just peel back that area and re-apply.
Excessive rubbing will damage the design.
Please Note: Pressing too hard may cause your hands to gather ink (due to the natural oils on your hands), and could transfer from your hands onto another surface or damage your decal.
Decal is not designed to be cleaned as this can damage the design. If dusty wipe over with a dry cloth.
Think you might want to remove and re-use them?
Keep the backing paper! Carefully roll it up and keep it stored in the tube. Remove the extra material left over from around the decals to make placing the decals back on the backing paper easier.
Ensure when re-rolling the decals up that the design is facing out to reduce chances of creases.
Didn't keep the backing paper and need to relocate the decal?
The decals can safely be applied to a piece of cellophane and then rolled up, ensuring the design is facing out to reduce the chance of creases.
Choose your look
The hardest part of applying our decals is deciding what design you love the most! We have put together a few of the most popular spacing's to help give you inspiration and guidance to create your own special room.
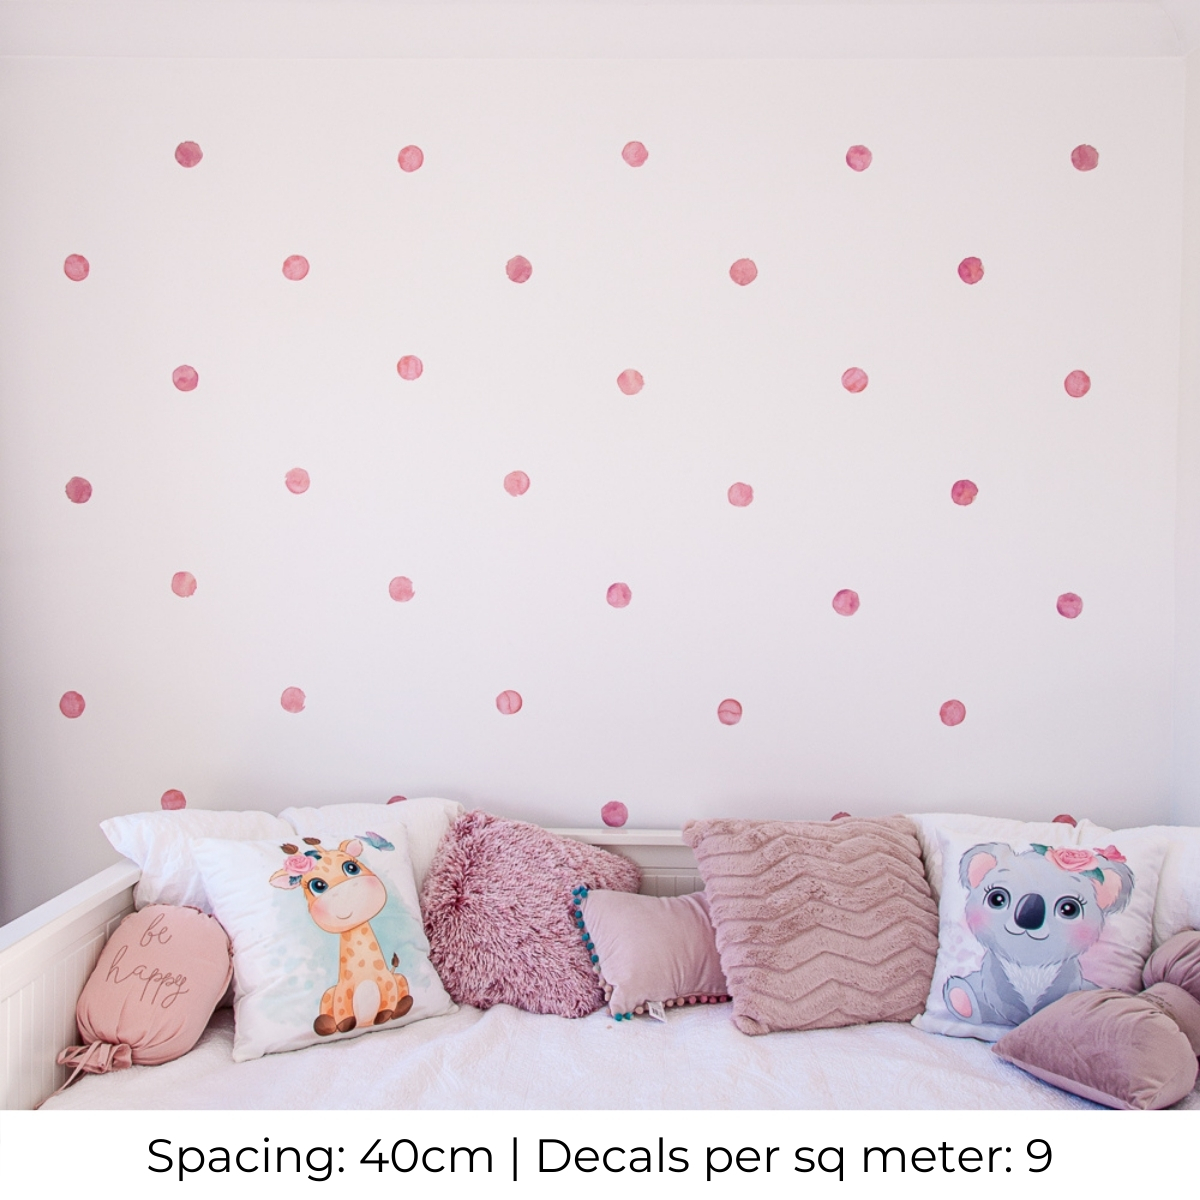
Uniform Designs:
To create a uniform look you will need
- To carefully calculate the number of decals needed to ensure you can complete your look you will need a template.
- When going for a uniform design it is better to have a few decals left over than not enough and have to wait for more to arrive before you can finish your look!
- Allow 30-60 minutes to complete these looks on a 2.3m x 3.5m wall.
We hope these designs will help inspire you!

Example of Template:

Example of Template:
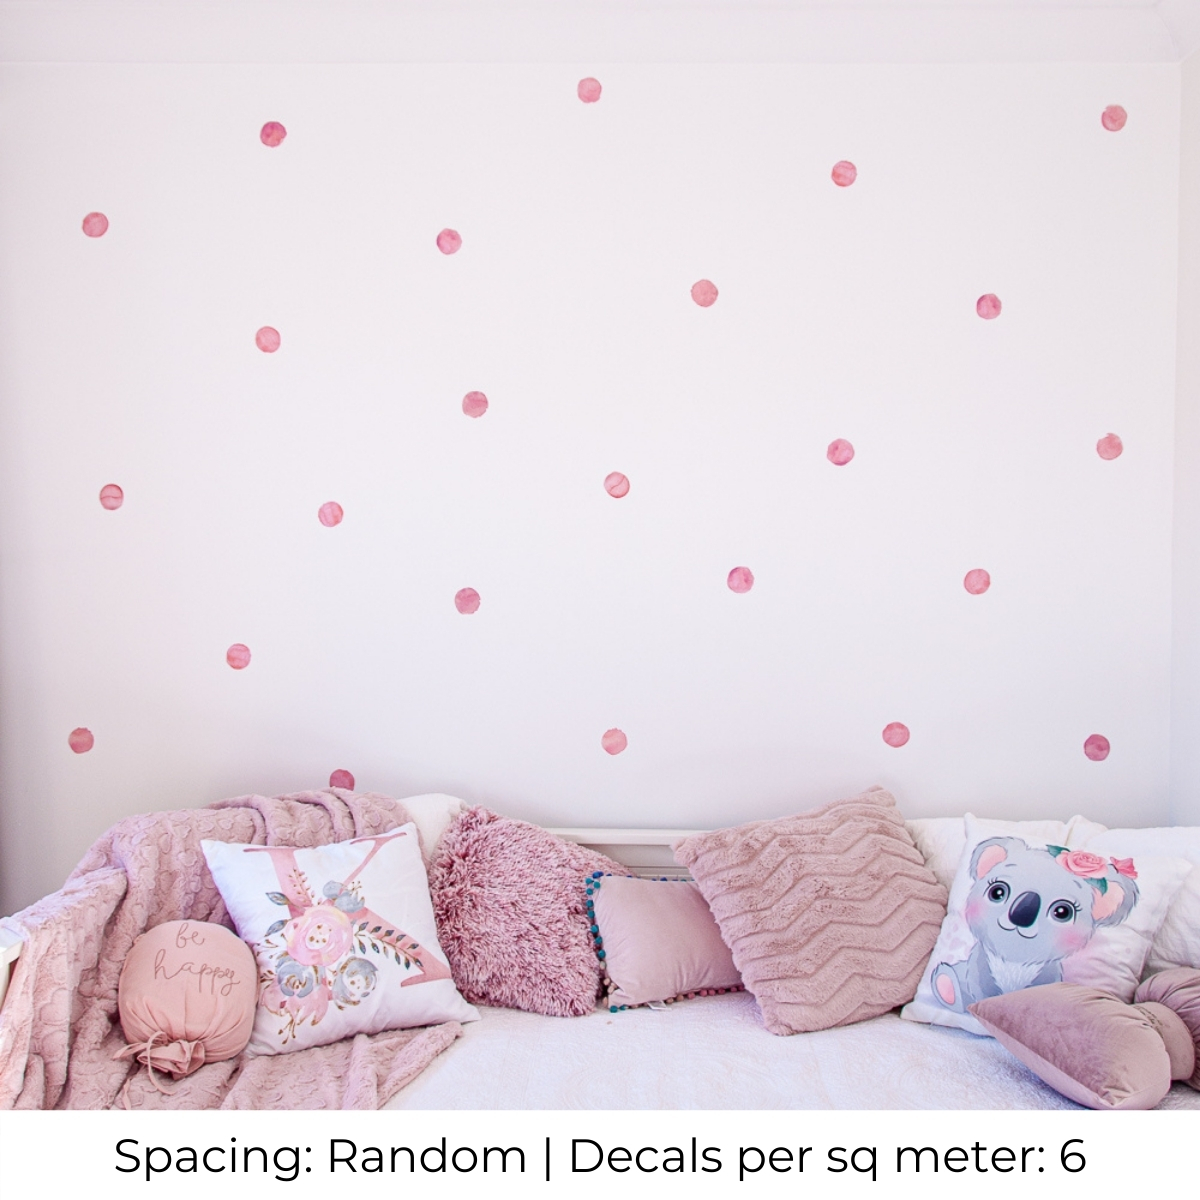
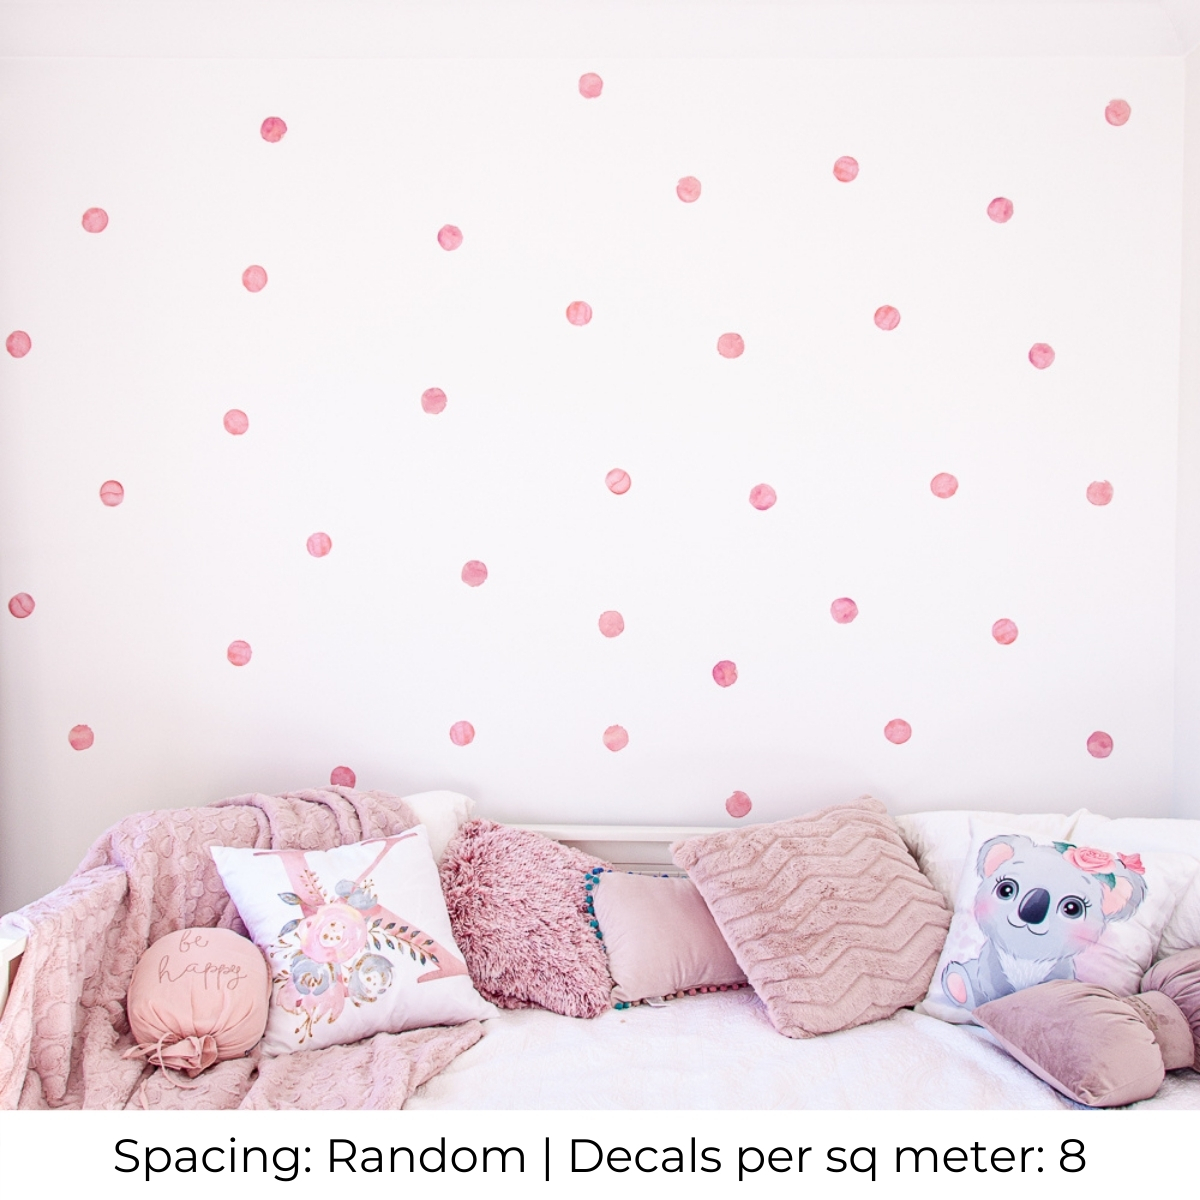
Random Designs:
To create a random design.
- Any number of decals can be used.
- Do not press the decals firmly down until you are happy with the placement.
- Allow 15-60 minutes to do a 2.3m x 3.5m wall.


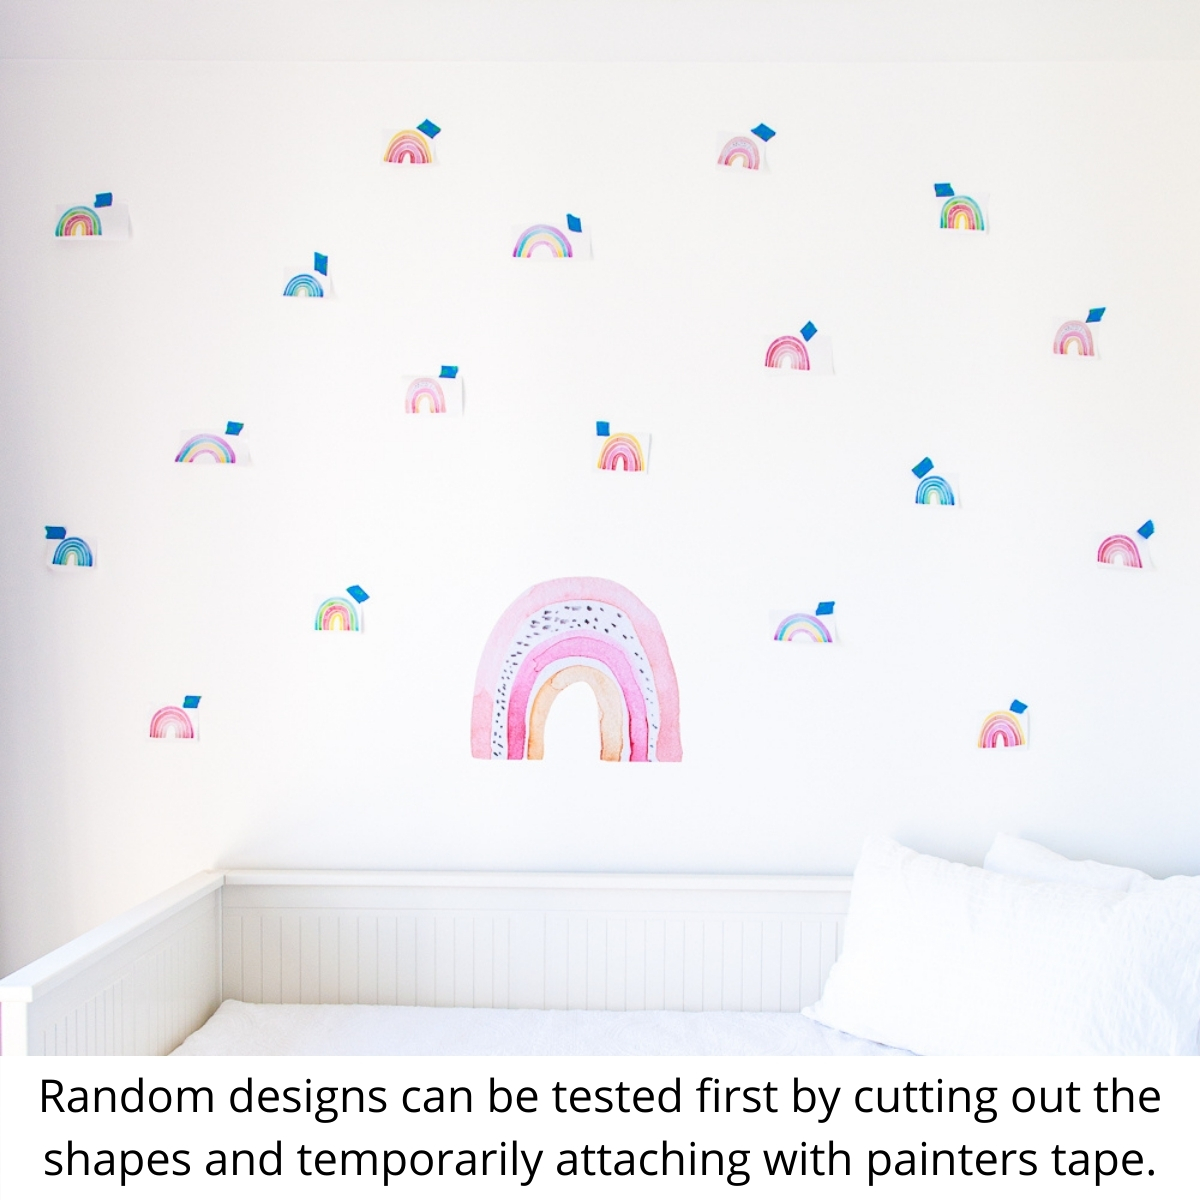
Complex shaped decals and designs:
When you have more specialised decals or larger decals it is best to plan where you want them to go before you start sticking them to the wall as there is a greater chance of damaging them if you attempt to move them.
- Leave the decal on its backing and separating all the designs by cutting around them but leaving as much backing paper as possible.
- Use a high quality painters tape to tack the pieces to the wall.
- Adjust the design till you are happy with the placement.
- Once you are happy go through and peel them off the backing and attach to the wall.
For more inspiration check out our Shop the Look. Also the review photos from our 100's of happy customers.
WARNING - For decorative purposes only, not a toy. Not suitable for children under 3 years due to strangulation and choking risk. Keep out of reach of small children at all times. Keep away from flames.